

How To Remove Quarantined Files From Windows Defender
Windows 10 has now completely changed the manner we apply Windows Defender. The new built-in Windows Defender is way better and even looks surprisingly well. The all new Windows Defender Security Center is a hub to all your reckoner's security settings.
Yesterday, the Defender on my computer marked some files equally virus and deleted them. I wanted to remove those files from the Quarantine, then I looked around and surprisingly I was non able to find information technology. But playing effectually with it for some time got me to the 'Quarantine' and some other settings. So here is a short mail service demonstrating how you can remove your files from Quarantine in Windows Defender Security Center on Windows 10.
Remove or Restore files from Quarantine in Windows Defender
i: Open Windows Defender Security Eye from the organisation tray area.

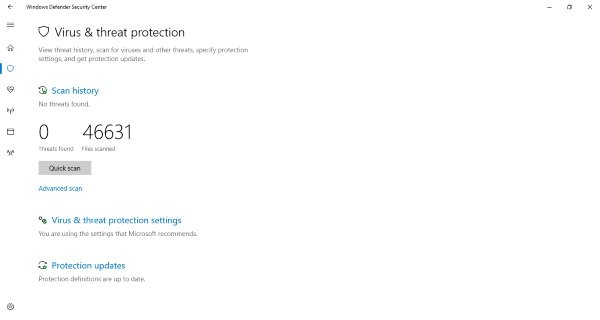
2: Once opened, click on the starting time menu option that says "Virus & threat protection".
iii: Now look for 'Scan History' merely below the championship and description.
4: Once you are inside 'Browse History', look for 'Quarantined Items' and then click on 'Meet Full History' to view all the quarantined items.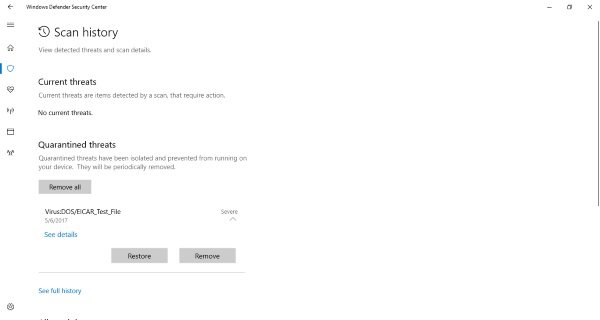
5: Y'all can easily remove quarantined items by hitting the Remove push. Otherwise, yous can restore them back past clicking on the Restore button.
So that was pretty simple. While yous can remove files and programs from the 'Quarantined' department, you lot tin can besides add together them to the 'Immune Threats' as well. There might be some programs or files yous trust just Windows Defender keeps marking them as threats. And then, any of such files can be moved to this section and these files volition never exist deleted once more. Remember if you lot've restored a file and not added it to 'Allowed Threats' or 'Exclusions', the file may go quarantined again. Dealing with infected files can be risky. Please proceed at your own run a risk and make certain you can verify the publisher of the file and yous trust it.
There is also something called 'Exclusions' in Windows Defender. Exclusions are nothing simply a list of files that y'all want not to be scanned. Files marked as exclusions volition exist skipped while performing a virus browse by Windows Defender. To add together an exclusion, follow these steps:
Add Exclusions in Windows Defender Security Center
ane: Open Windows Defender Security Centre from the arrangement tray expanse.
2: Click on 'Virus & threat protection'.
3: Now open, 'Virus and threat protection settings'.
4: Scroll to the lesser and find 'Exclusions'. Click on 'Add or remove exclusions'.
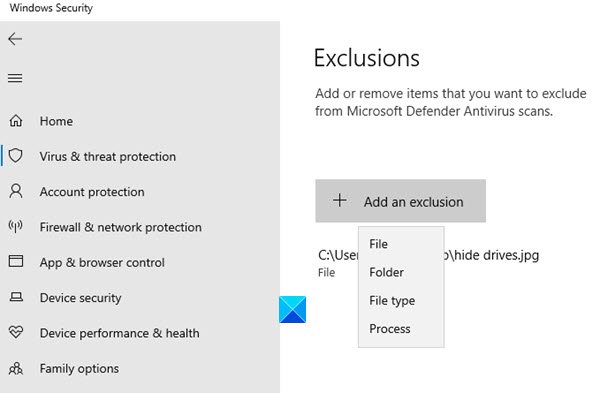
5: Now hit the Plus button and choose they type of exclusion you want to add. I am adding a file exclusion for reference.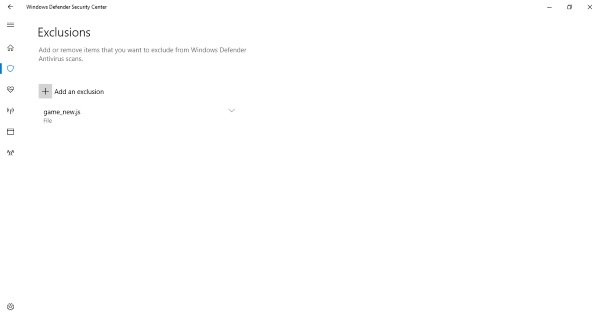
You tin can add a file, folder, File type, or Process to the Exclusions list.
Exclusions can exist removed easily as well. All you need to practise is click the relevant downward arrow and hit the 'Remove' push button.
Then, this was all nigh quarantined and excluded files on new Windows Defender. All these steps apply to Windows Defender Security Center introduced in Windows x Creators Update v1703 and afterwards.
This post shows how you can harden Windows Defender protection to the highest levels on Windows x by changing a few Group Policy settings.

Source: https://www.thewindowsclub.com/manage-quarantined-exclusions-windows-defender-security-center
Posted by: pastortrie1935.blogspot.com
0 Response to "How To Remove Quarantined Files From Windows Defender"
Post a Comment